










Got a New
Seed Cube Feeder?
Got a New
Seed Cube Feeder?
Seed Cube Feeder?
Let's help you get started!


Shop feeders
Shop bird food
Find the right feeder for your bird
Or pick a popular bird
Guides and people
Search your bird
Or pick a popular bird:
Every bird is different. Tell us yours and we'll tailor your experience around them.
Your bird
Your other bird


Step-by-step videos and fitment instructions for your Seed Cube feeder.
Get the right setup for your cage in minutes.
This series will guide you through installation, filling, cleaning, and fitting tips so you can get the most out of your feeder.
How to set up your new Seed Cube feeder.
Your feeder includes two hook options. The Talon-Hook system should always be your first choice. It is engineered for a strong, secure fit on standard horizontal cage bars and is the recommended setup for most cages.
The universal fit hooks are included for alternate or unusual cage bar layouts where Talon-Hooks cannot be used. Hooks can be installed into the top or back of the feeder, depending on your setup.
The feeder can be mounted inside or outside the cage based on your preferred feeding position. It is your responsibility to ensure the hooks are fitted correctly and secured firmly to the cage bars before use.
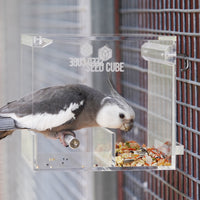
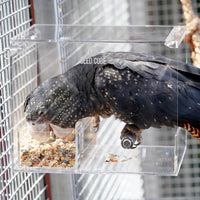
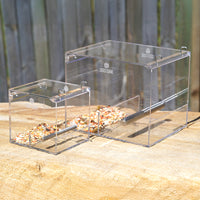
You can mount the feeder outside the cage over an open feed door, or inside the cage in a comfortable, easily accessible spot for your bird.
When choosing a location, use a horizontal bar that keeps the feeder's opening aligned with the cage entry so your bird can step straight in without twisting or reaching. For internal setups, position a natural branch or perch directly at the entry point.
This gives your bird a stable landing spot, encourages confident entry, and helps them feed comfortably without stretching or losing balance.
How to look after your new Seed Cube feeder.
Place your bird's food directly into the bottom of the feeder, towards the back. Provide only what your bird needs for the day, removing any leftover food and debris before replacing it with fresh food to maintain good hygiene.
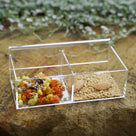
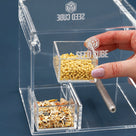
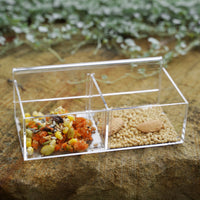
Fill your Easy-Tray or insert with your bird's food before sliding it through the main opening of the feeder. The removable design makes daily food changes easier, allowing you to empty, clean and refill the insert as part of your bird's daily feeding routine.
Empty any leftover food and debris into a bin. Wash the feeder with warm water, mild dishwashing liquid and a soft, lint-free cloth. For stubborn residue, allow it to soak briefly before gently wiping clean.
If using an Easy-Tray or insert, remove it for separate cleaning. Clean all food-contact surfaces daily, particularly after serving fresh foods, and thoroughly clean the feeder at least weekly or as needed.
Allow everything to dry completely before refilling.
Important: The acrylic components of Seed Cube feeders, Easy-Trays and inserts are not dishwasher safe. Avoid abrasive cleaners, harsh chemicals and excessive heat.
For those not-so-normal cage setups
When mounting inside the cage, you may need the stopper bar to help keep the feeder level.
Test the feeder's position against the cage bars before attaching the stopper bar. If needed, secure it to the bottom rear of the feeder, on the side facing away from the cage, using the supplied adhesive.
Check the positioning carefully before securing it permanently.
When mounting your feeder on cages with square or round tube frames, the universal hooks provide a custom-fit solution.
Watch the video, then follow the instructions below to drill and secure your feeder.
This setup ensures a strong, tamper-resistant hold that keeps the feeder steady and correctly aligned on the cage.
For square or round tube cages using the universal hooks.
When mounting your feeder on cages with square or round tube frames, the universal hooks provide a custom-fit solution. Watch the video above, then follow the instructions below to drill and secure your feeder. This setup helps create a strong, tamper-resistant hold that keeps the feeder steady and correctly aligned inside the cage.
Note: Once mounted, the feeder will sit about 5 mm (3/16 in) lower than your marked position.
Working in inches? Our hooks are 2.8 mm, which is 0.110 in. The nearest bit under that is 7/64 in (2.78 mm), so drill at 7/64 in, then test a hook in the hole. If it will not quite seat, ease the hole open with the same bit, working it around in small circles and checking the fit as you go. Take off very little at a time. It is easy to open a hole and impossible to close one. Avoid jumping straight to 1/8 in (3.18 mm), as that leaves the hook loose.
As you tilt the feeder into place, the hooks will grab inside the drilled holes, locking it in tightly. This provides a very solid hold on square or round bar tubing. It is ideal for curious birds, as the hook ends are hidden inside the tube and are difficult to tamper with.
Important: Drilling modifies your cage. That is your choice and your responsibility, and it is not covered by our warranty. This method does not use our Talon-Hooks, so please take extra care and work slowly.
Do not overdrill. Our hooks measure 2.8 mm (0.110 in, or 7/64 in), so the hole only needs to be a snug fit. Start with the smaller bit, test the fit, and open it up only if you have to. An oversized hole lets the hooks move around and the feeder will not hold securely.
If you are not confident using tools or modifying your cage, ask someone experienced for help. Always wear eye protection and take care during installation to avoid injury or damage.
A few things to review for the best setup
Whether mounted internally or externally, ensure a perch is comfortably positioned near the entrance of your Seed Cube feeder to encourage your bird to enter and access their food easily.
Before use, check that your Seed Cube feeder is securely mounted, sits level and is easily accessible to your bird. Ensure all hooks are firmly attached and inspect the feeder regularly for signs of damage, loose fittings or excessive chewing.
If anything appears loose or damaged, stop using the feeder until the issue has been resolved.
If you're unsure about the installation or fitting, please contact us for assistance.
Please note that incorrect installation may cause the feeder to fall or become damaged. Damage resulting from incorrect installation is not covered under warranty, subject to your rights under Australian Consumer Law.

Some birds investigate and use it quickly, while others may take several days or longer. Avoid forcing your bird into the feeder or removing their usual food source before they are confidently using it.
Read our step-by-step guide to introducing your bird to the Seed Cube feeder: